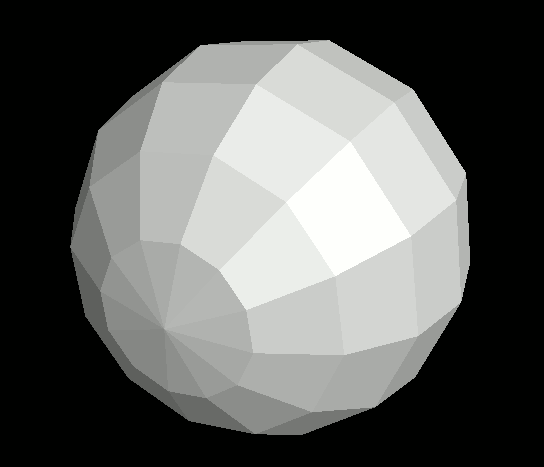
[ Prev | Index | Next ]
Japanese English

Creating and Placing Light Sources (and Adjusting Their Properties)

This section explains how to create and place light sources in a 3DCG scene, as well as how to configure their color and brightness.

Sponsored Link


Placing a Sphere Model

Let's begin with a bit of setup.

To visualize how lighting affects 3D objects, we'll start by placing a simple sphere model. We'll go into more detail about model creation and placement in the next chapter, so for now just run the following code:


import graphics3d.Graphics3DFramework;
import Graphics3D;

// Called at the start of the program
void onStart ( int rendererID ) {
	
	// Optional: Set window size and background color
	setWindowSize( 800, 600 );
	setBackgroundColor( 0, 0, 0, 255 );
	
	// Create and place a sphere model
	int sphere = newSphereModel( 2.0, 2.0, 2.0, 12, 8 );
	mountModel( sphere, rendererID );
}
MountSphereDefaultLight.vcssl

When you run this program, a sphere will appear at the center of the screen. You'll notice that it has proper shading and appears three-dimensional. This is because the Graphics3DFramework automatically provides and places a default light source for you.

Execution Result
Execution Result
The sphere is rendered with shading, giving it a realistic, three-dimensional appearance.

Without a light source, the sphere would not be illuminated and would appear completely black. Let's try turning off the default light sources to confirm this. Add the following three lines somewhere in your onStart function:


...

// Called at the start of the program
void onStart ( int rendererID ) {
	
	// Turn off the default lights
	setDirectionalLightBrightness( 0.0 );
	setAmbientLightBrightness( 0.0 );  
	
	...
MountSphereNoLight.vcssl

Now when you run the program, the sphere will appear completely black -- because no light is hitting it.

Execution Result
Execution Result
With all light sources disabled, the sphere is rendered completely black.

Creating Light Sources

If you want finer control over lighting, you can disable the default light sources and manually create and place your own.

There are three functions for creating different types of lights:

int newLight ( int x, int y, int z, float power )
Creates a directional light that illuminates the entire scene from a specific direction.
int newLight ( int x, int y, int z, float power )
Creates a point light that emits light radially from a specific point.
int newAmbientLight ( int x, int y, int z, float power )
Creates an ambient light that uniformly lights objects regardless of direction (simulating environmental lighting).

Arguments:

  • x, y, z: Specify the direction or position vector of the light source.
  • power: Brightness of the light, from 0.0 (off) to 1.0 (max). A typical value is around 0.5 when using a single light source for the entire scene.

These functions return a unique light ID for each created light source, which youfll use for placing and configuring them.

Placing Light Sources

To place a light source into the scene, use the mountLight(...) function.

- Basic Function Format -

void mountLight ( int lightID, int rendererID )

Arguments:

  • lightID: The ID of the light source.
  • rendererID: The ID of the renderer to which the light should be applied.

You can also place a light within a specific coordinate system by adding one more argument:

- Extended Function Format -

void mountLight ( int lightID, int rendererID, int coordinateID )

Arguments:

  • lightID: The ID of the light source.
  • rendererID: The ID of the renderer.
  • coordinateID: The ID of the coordinate system where the light should be placed.

Setting Light Color

To set the color of a light source, use the setLightColor(...) function.

- Function Format -

void setLightColor (
  int lightID,
  int red, int green, int blue, int alpha
)

Arguments:

  • lightID: The ID of the light source to configure.
  • red, green, blue, alpha: The RGBA components of the light's color. Each value should be between 0 and 255. For a review of how color components work and how they are blended, see the Base Setup section.

When you illuminate a model with colored light, each component of the light only affects the matching component of the model's color.

For example, the blue component of the light affects only the blue component of the model -- it doesn't affect the red or green.

This means that a white model illuminated by blue light will appear blue. But green or red models illuminated by blue light will remain mostly dark.

Setting Light Position

To change the position or direction of a light source, use the setLightLocation(...) function.

- Function Format -

void setLightLocation ( int lightID, float x, float y, float z )

Arguments:

  • lightID: The ID of the light source to move.
  • x, y, z: The directional or positional vector of the light source.

Setting Light Brightness

To change the brightness of a light source, use the setLightBrightness(...) function.

- Function Format -

void setLightBrightness ( int lightID, float power )

Arguments:

  • lightID: The ID of the light source to configure.
  • power: Brightness value, ranging from 0.0 (off) to 1.0 (max). A typical value is around 0.5 if you're using one light source to illuminate the entire scene.

If you use multiple light sources, you'll need to reduce the brightness of each one accordingly.

Also, if you set all lights to the same brightness and position them evenly around the object, the shading may become too uniform and lose depth. To avoid this, consider assigning slightly different brightness values to each light source.

Note: No Distance-Based Light Attenuation

VCSSL light sources do not reduce brightness based on distance. Whether the object is near or far, it will be lit with the same intensity.

If you want a distant light to appear dimmer, you'll need to manually reduce its brightness using setLightBrightness(...).

(There are future plans to add distance-based attenuation as a separate setting.)

Example Program

Now let's update the previous program to place custom light sources. Try running the code below:


import graphics3d.Graphics3DFramework;
import Graphics3D;

// Called at the start of the program
void onStart ( int rendererID ) {
	
	// Optional: set window size and background color
	setWindowSize( 800, 600 ) ;
	setBackgroundColor( 0, 0, 0, 255 );
	
	// Turn off the default light sources
	setDirectionalLightBrightness( 0.0 );
	setAmbientLightBrightness( 0.0 );
	
	// (1.2, 1.5, 1.0): Place a directional light with brightness 0.5
	int light = newLight( 1.2, 1.5, 1.0, 0.5 );
	mountLight( light, rendererID );
	
	// (0.0, 0.0, 0.0): Place an ambient light at the origin with brightness 0.5
	int ambientLight = newAmbientLight( 0.0, 0.0, 0.0, 0.5 );
	mountLight( ambientLight, rendererID );
	
	// Create and place a sphere model
	int sphere = newSphereModel( 2.0, 2.0, 2.0, 12, 8 );
	mountModel( sphere, rendererID );
}
SphereWithLight.vcssl

When you run this program, youfll see a sphere properly lit by your custom light sources. The output looks the same as the earlier example, but this time youfre using your own light setup, instead of the default lights provided by the framework.

  • The overall brightness is determined by the directional light created with newLight(...).
  • The brightness of shaded areas is influenced by the ambient light created with newAmbientLight(...).

Execution Result
Execution Result
The sphere is lit properly, with realistic shading and depth.


Sponsored Link


Japanese English
Index
[ Prev | Index | Next ]
News From RINEARN
* VCSSL is developed by RINEARN.

English Documentation for Our Software and VCSSL Is Now Nearly Complete
2025-06-30 - We're happy to announce that the large-scale expansion of our English documentation with the support of AI — a project that began two years ago — has now reached its initial target milestone.

VCSSL 3.4.52 Released: Enhanced Integration with External Programs and More
2025-05-25 - This update introduces enhancements to the external program integration features (e.g., for running C-language executables). Several other improvements and fixes are also included. Details inside.

Released: Latest Version of VCSSL with Fixes for Behavioral Changes on Java 24
2025-04-22 - VCSSL 3.4.50 released with a fix for a subtle behavioral change in absolute path resolution on network drives, introduced in Java 24. Details inside.

Released the Latest Versions of RINEARN Graph and VCSSL - Now Supporting Customizable Tick Positions and Labels!
2024-11-24 - Starting with this update, a new "MANUAL" tick mode is now supported, allowing users to freely specify the positions and labels of ticks on the graph. We'll explain the details and how to use it.

Released Exevalator 2.2: Now Compatible with TypeScript and Usable in Web Browsers
2024-10-22 - The open-source expression evaluation library, Exevalator, has been updated to version 2.2. It now supports TypeScript and can be used for evaluating expressions directly in web browsers. Explains the details.

Behind the Scenes of Creating an Assistant AI (Part 1: Fundamental Knowledge)
2024-10-07 - The first part of a series on how to create an Assistant AI. In this article, we introduce the essential knowledge you need to grasp before building an Assistant AI. What exactly is an LLM-based AI? What is RAG? And more.

Launching an Assistant AI to Support Software Usage!
2024-09-20 - We've launched an Assistant AI that answers questions about how to use RINEARN software and helps with certain tasks. Anyone with a ChatGPT account can use it for free. We'll explain how to use it.

Software Updates: Command Expansion in RINEARN Graph, and English Support in VCSSL
2024-02-05 - We updated our apps. This updates include "Enhancing the Command-Line Features of RINEARN Graph" and "Adding English Support to VCSSL." Dives into each of them!